Day 2 - Agenda
1. Sign in/Log into LHS Mentor Page - Popplet page available from pull down menu
2. PreAssessment done from last week?
Reflect on last week's tool - Padlet (for portfolio reflection).
Portfolio Requirements page available from pull down menu
3. Introduction to popplet
4. Activities: Using Popplet
5. Meeting Reflection
Next class: Monday, February 27, 2:45, Library
2. PreAssessment done from last week?
Reflect on last week's tool - Padlet (for portfolio reflection).
Portfolio Requirements page available from pull down menu
3. Introduction to popplet
4. Activities: Using Popplet
5. Meeting Reflection
Next class: Monday, February 27, 2:45, Library
Popplet.com
|
What is it?
* mind-map, graphic organizer * can be used to create a thinking map * can be used as a collaborative tool for brainstorming and sequencing *video tutorial available on site *New feature: application can be downloaded so popplets can be saved for offline presentations (no internet connection needed!). Who can use it? * an individual and then shared with others * used by a group (with access rights) to share ideas and collaborate. What are some limitations? (free version) * Popple (balloon) format is limited * 5 popplet limit. Workaround: sign up with different accounts (Maybe by course taught?) * Popple colors, fonts are limited *Popples only come in one shape *Alert! Email name issue: cannot start an email with a number. This is the response Kristy received from popplet: "In the situation where number emails are being used, we recommend using a "faux" email address along the lines of "[email protected]" (or in this case, perhaps a letter first, then the actual email address), for each student. This means that your students will not get system alerts, such as password reset notifications, but other than that, a Popplet username is primarily just for logging in. If any password issues come up with a student, please send an email to [email protected] and we will take care of the reset on our end. I highly recommend you or your students store these usernames/faux emails offline somewhere, along with the password, just in case." How do I start? 1. Go to popplet.com 2. Sign up for a free account 3. Open popplet.com and click on "make new popplet" 4. You can choose the wallpaper color 4. Double click on the screen to create a popple 5. To make a connecting line, click on a popple and drag the circle to another popple to make a connecting line. If you change your mind, "x" it out. 6. Additional information, click here. |
What are some possible applications?
Instructional Tool * A visual aid for your lecture. When you click on the popple, it enlarges, and you can control the size by using the "+" and "-". You can also drag the entire poppet to reposition on the screen. * Gallery walk to showcase student work * Review for a test by posting questions and clicking on them * Teacher can add comments to popples Student Activity * Collaborate with each other by posting popples - no limit * Set up to be a running blog, visually showing relationships with the connecting lines. NOTE: Works best with just a couple of students - not the whole class. Program has a hard time adding a lot of collaborators at the same time. To add: click on ? mark/share Student Product * Create a visual/poster on a topic * Size the poster to view on one screen Tips and Tricks 1. Double click anywhere on the wall to start a popple. 2. You can add a title, text and image all in one popple. Resize for better viewing. 3. You can choose to upload a file, find a link to a picture from google images. 4. If you screen shot pictures and save to your desktop, you can then upload without worrying about internet connection. Saves time! 5. Convert a youtube video so that you can show it in school with keepvid.com. Thanks for tech team for these instructions! 6. You can change color of the popple to differentiate ideas or details of a single thought. 7. Click on popple to enlarge. 8. Click on "view all" or "full screen" to see entire popplet on one screen (good for screen shot) 9. Connecting lines (length, position helps to organize information. 10. Have students number the balloons if the popplet is sequential. 11. If a student is doing a popplet independently, they can hide their name (see settings). If they are collaborating with others, they names show up. 12. Find more instructions under the ? in the top right corner 13.*If someone shares a popplet with you as collaborator, you can add, but cannot change anything the others did14 *Presentation mode: settings - view - presentation choices. Allows you to control sequence of popples |
Teacher Notes
1. Provide time for students to sign up for account. At that time, point out to students that as soon as they create a new popplet, the url for that popple is in the url address box - that is what they need to share with you. 2. Provide students a sandbox (practice) activity before starting real project - they will feel more comfortable with the tool - could be individual or group. Have them share the popplet with teacher, so that you know they feel comfortable with the tool. 3. Having students complete a planning sheet before they create a popplet will help them focus on content information. Then time spent on popplet.com can focus on creating an effective visual product. *Storyboard planning sheet 4. A rubric provides clear expectations. Consider a weighted rubric for visual products. 5. Require at least one citation for an image (since it is a visual product). If they copy the popplet url into citationmachine.net, it will automatically create a citation for them to copy and paste into a popple. 6. Two ways the students can share their final product with you: *email you the popplet url for you to view online (note: they need to 'share' it to make it public). *they could take a screen shot, but the image needs to be large enough for you to see and scroll over the poppies. The entire poppet needs to be captured on one screen. 7. Needs some ideas? * http://blog.popplet.com/revision-techniques-tips-and-templates-with-popplet/ *http://blog.popplet.com/category/popplets-in-education/ 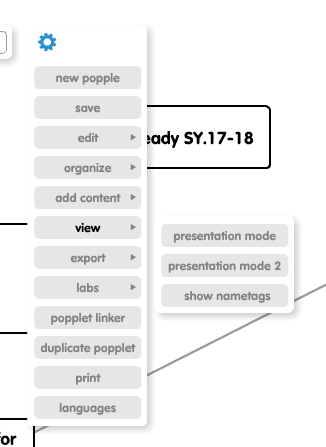
Image above: settings icon
|
Student Instructions you may want to include.
1. Think about which images and words would best communicate your message. It is a visual product, which means that the pictures are as important as the text. 2. Choose your words wisely – since this is a visual product, the few words used need to have the most impact. 3. If you are showing a process (step-by-step), number the popples. 4. Arrange the popples so that they are visually appealing. 5. Minimize the blank spaces between popples by resizing and repositioning the popples. 6. You can change the color of the popples to help separate ideas. 7. Resize/rearrange your popplet so that the entire poster can be viewed on one screen. You can do this by adjusting the lines between the popples. This means the viewer does not have to scroll down/across to see the entire poster. 8. Too many lines connecting too many popples make it confusing - keep it simple. 9. Remember to include your name! |
Additional Information
Popplet Review (by teacher)
TeachersFirst Review
Review by teaching history.org
Step-by-Step Instructions on using popplet in your classroom
Popplet Review (by teacher)
TeachersFirst Review
Review by teaching history.org
Step-by-Step Instructions on using popplet in your classroom
|
|
|
|
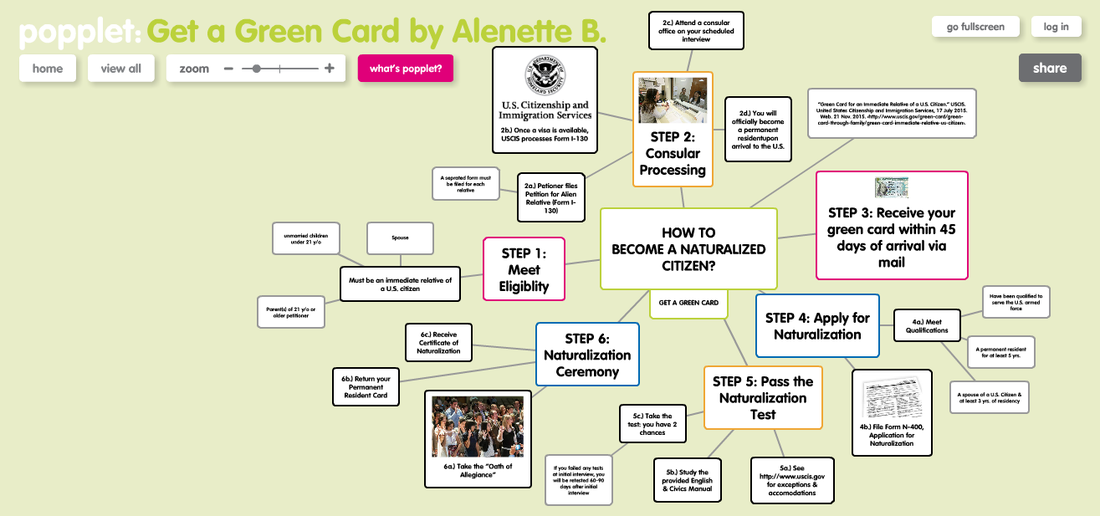
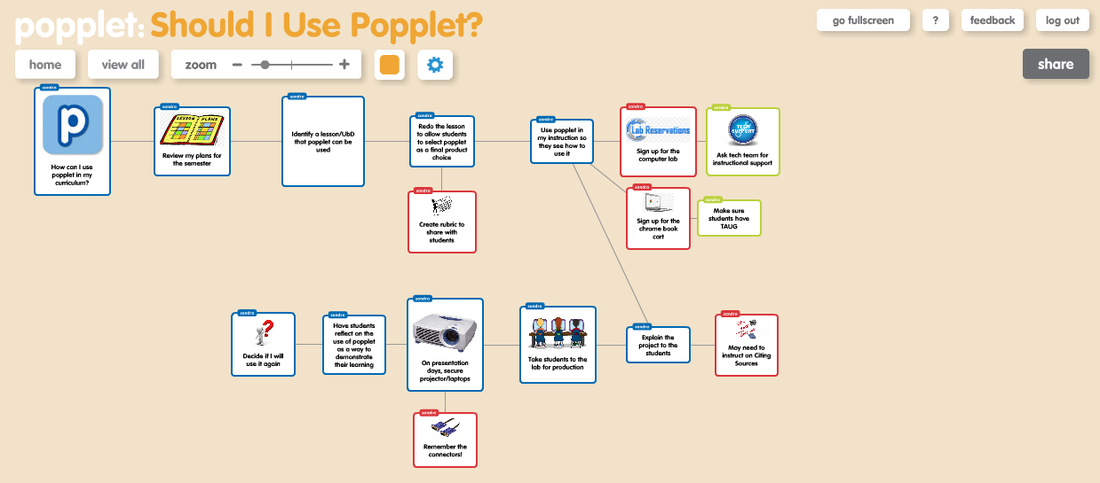
Popplet Samples
|
Student Work - Met
*changed wallpaper color *all requirements met 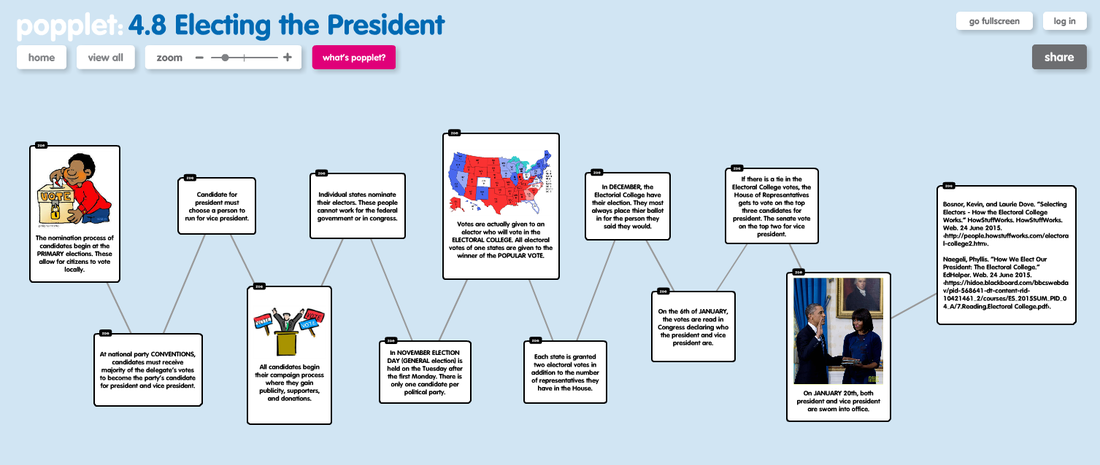
Student Work - Met
|
Student Work - Approaching
*while requirements met, not visually effective *not sure what is related/connected 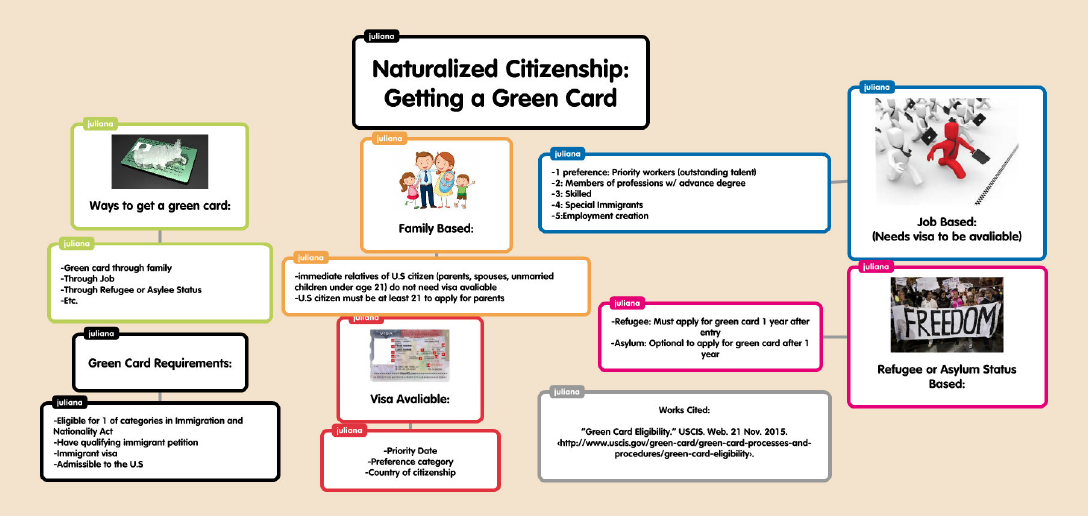
|
Sandbox Activity - Let's Practice!
Activity 1: Using popplet as group work if you received an email from me on your gmail account
1. This popple is used like a bubble thinking map
2. Practice by contributing to this popplet: http://popplet.com/app/#/3324629
Activity 2: Create A Popplet
1. Create your popplet account
2. Login to create a new popplet
3. Create a popplet. It could be sequential, like a recipe and/or directions on how to do something or an if this/then that diagram
Click here for detailed instructions that can be used with your students
Popplet Requirements
*Include a Title and Your Name
*At least 3 popples
*Change the color of the poppies
*Connect the poppies
*Include an image, video or audio for each popple
*Space your popples so that 'white' space is minimzed
*Space your poppies so that all the poppies can be viewed on the screen without scrolling
When you are done, send me a copy of your popplet. This can be done:
*send me a url link via contact box in the homepage of this course
*take a screen shot and send as an attachment to me ([email protected])